Why This Issue Happens:
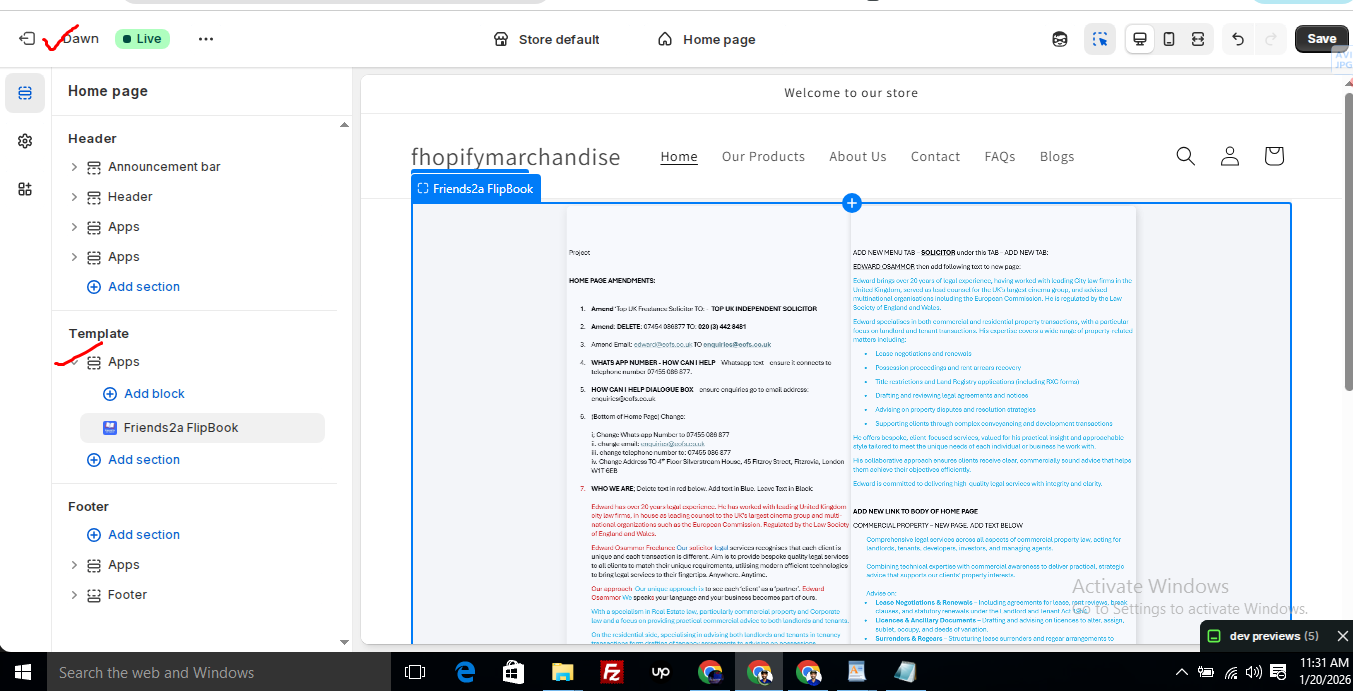
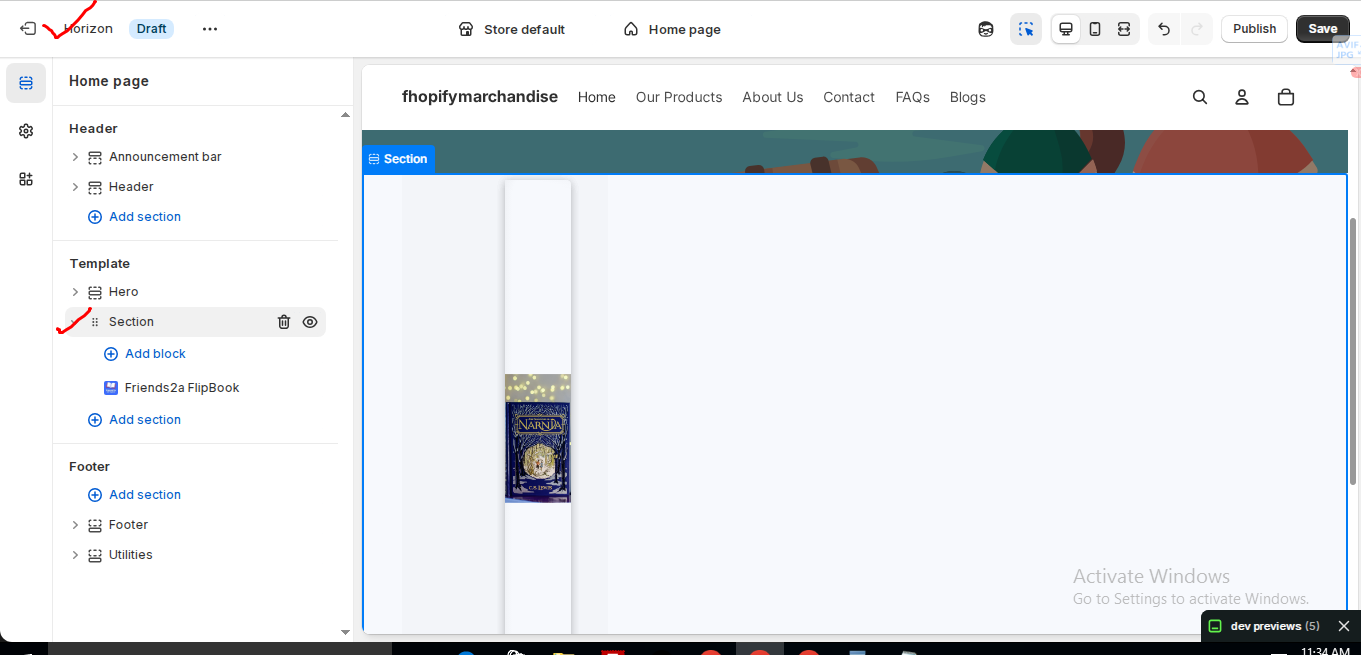
In the Horizon new update theme (and some other Shopify free themes), when you add an app block, it is automatically wrapped inside a Section container.
This Section applies automatic CSS and admin UI styles, which may conflict with the app’s layout. As a result, app content such as FlipBooks or iframe-based apps may appear squeezed, misaligned, or broken.
This is a theme-level layout behavior, not an app bug.
How to Fix the Issue (Solution)
Please follow these steps carefully:
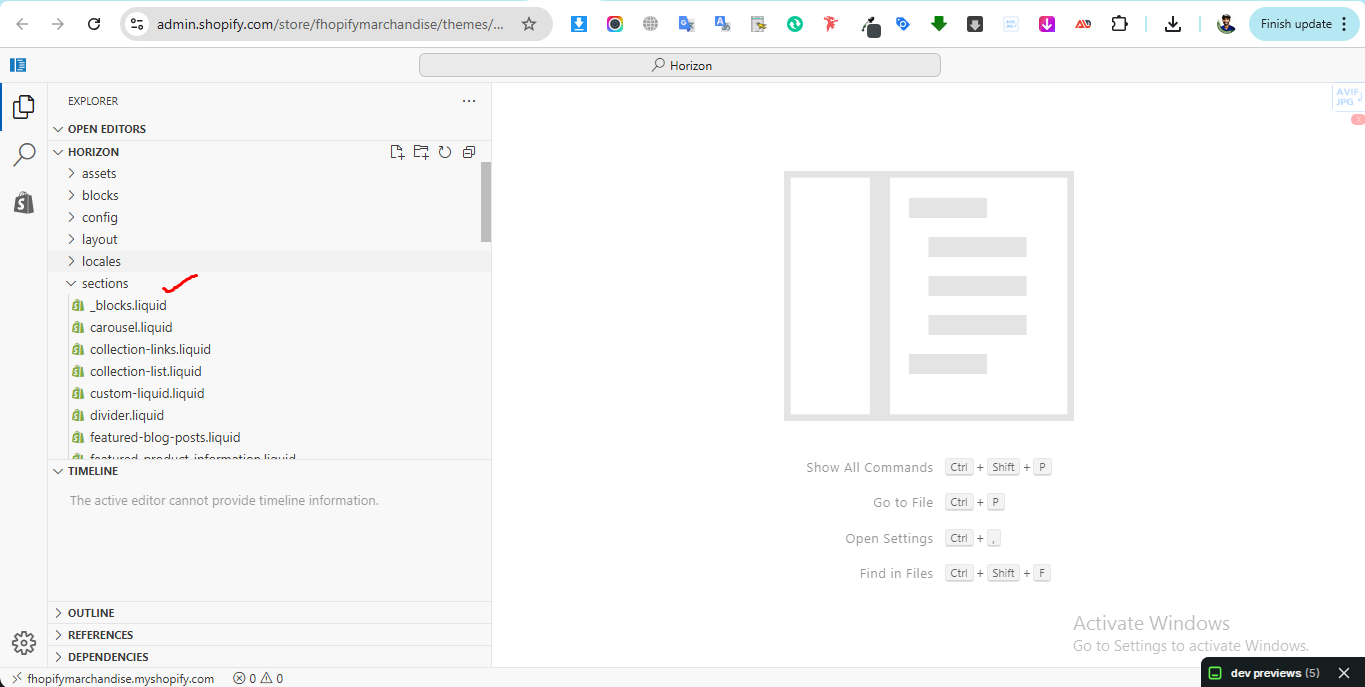
1. Go to Online Store → Themes → Edit code
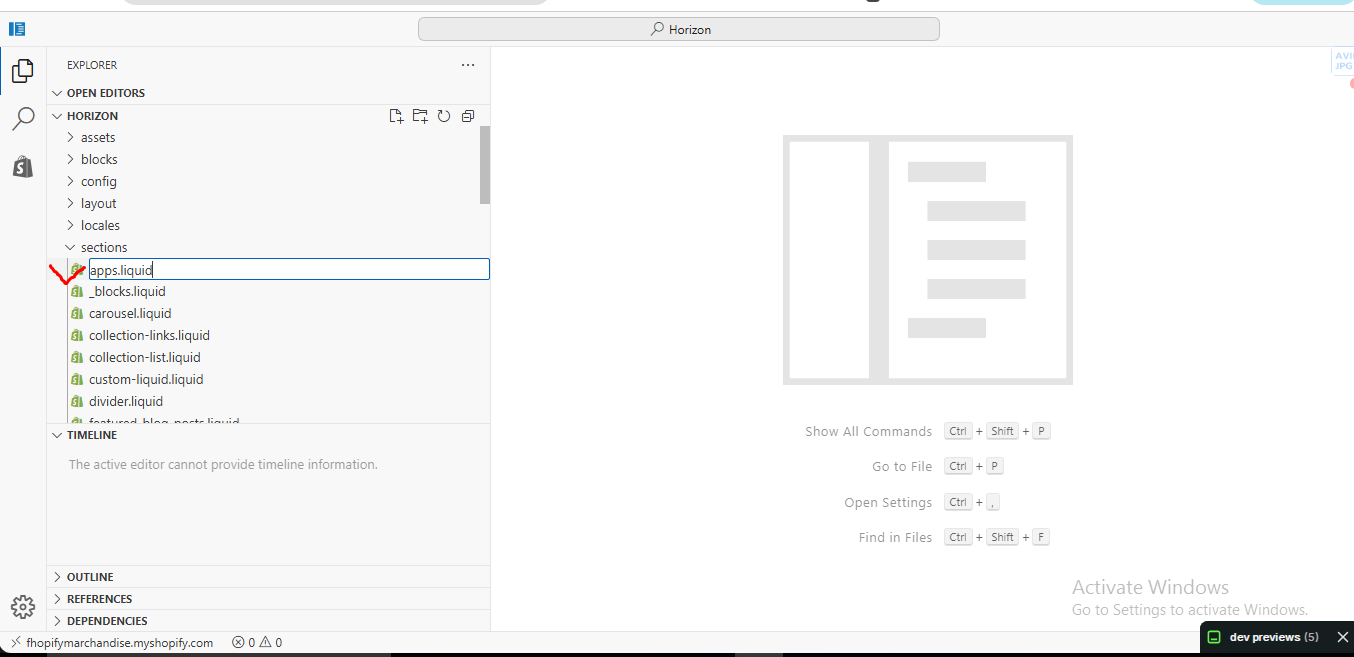
2. Open the Sections folder
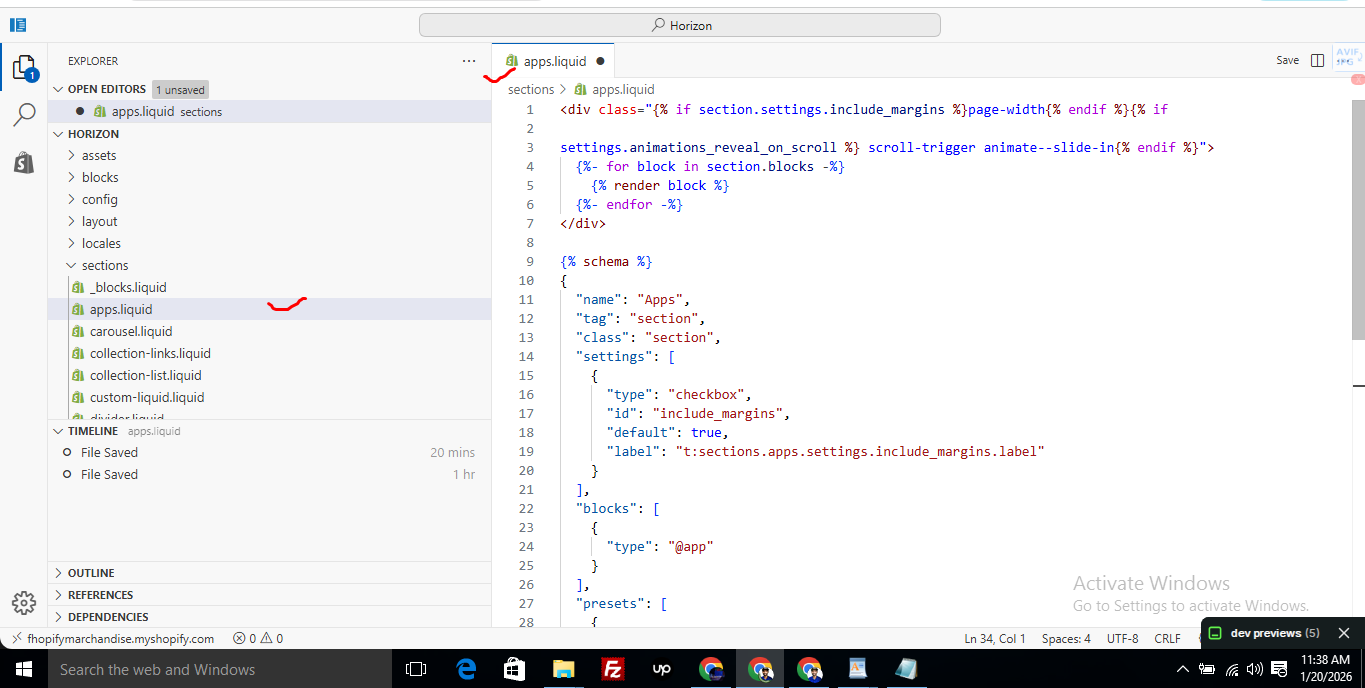
3. Find the file named apps.liquid
– If the file exists, open it and paste the provided code into it
– If the file does not exist, create a new file named apps.liquid and paste the code into it
4. Save the file
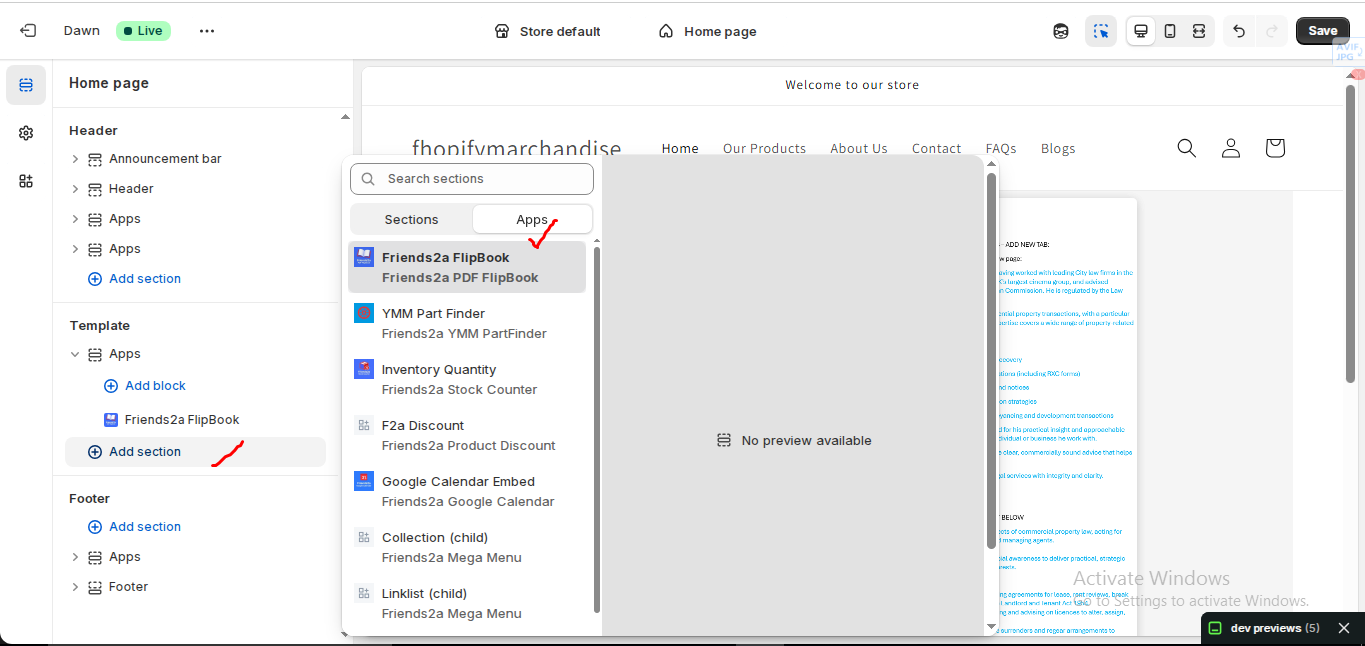
5. Go back to Theme Customization
6. Add the app block again
After completing these steps, everything should display correctly.
Summary :
– This issue is related to the Horizon / Shopify free theme layout behavior
– It is not an app bug
– Dawn, Shopify premium themes, and ThemeForest themes work without any issues
– Following the steps above will resolve the problem
If you still face issues after following this guide, please share updated screenshots and we will be happy to assist further.
					<div class="{% if section.settings.include_margins %}page-width{% endif %}">
  {% for block in section.blocks %}
    {% render block %}
  {% endfor %}
</div>

{% schema %}
{
  "name": "Apps",
  "tag": "section",
  "class": "section",
  "settings": [
    {
      "type": "checkbox",
      "id": "include_margins",
      "default": true,
      "label": "Include page margins"
    }
  ],
  "blocks": [
    { "type": "@app" }
  ],
  "presets": [
    { "name": "Apps" }
  ]
}
{% endschema %}
Prerequisites
⦁ A public Calendly booking link (e.g., https://calendly.com/username/30min).
⦁ A Shopify theme that supports Online Store 2.0.
Install & Add to a Page
1. Install the app from your Apps list.
2. Go to Online Store → Customize.
3. Choose the page where you want the booking (Home, Contact, a custom page, or Product page).
4. Click Add section or Add block → choose “F2 Calendly Appointment”.
5. Drag the block/section to the position you want and Save.
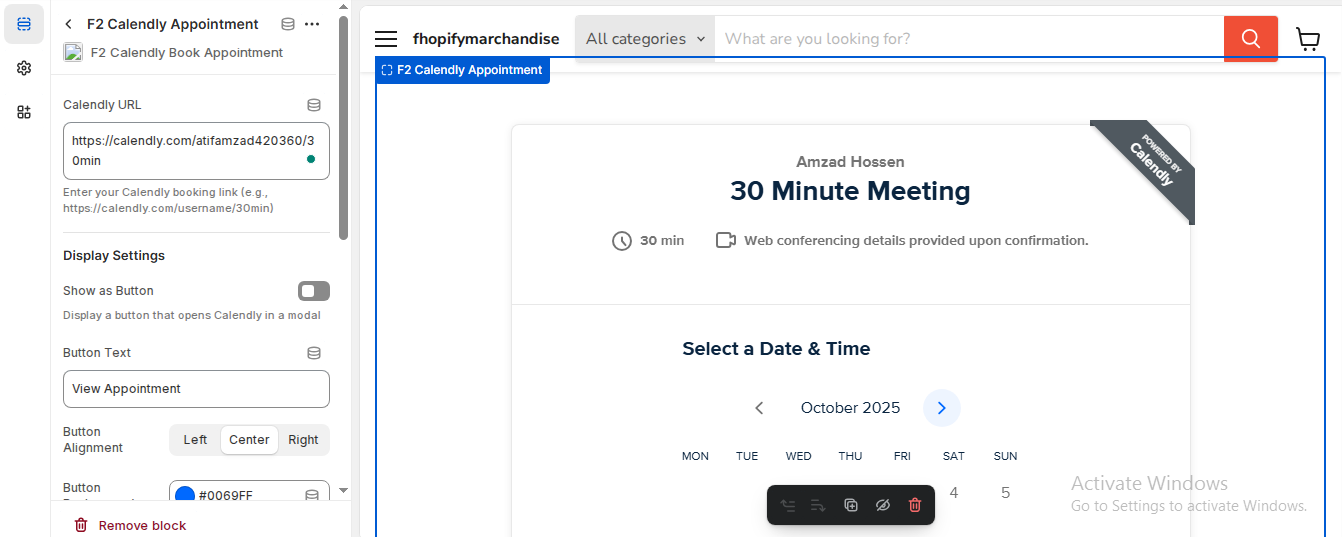
Configure the Block
Calendly URL: Paste your booking link (e.g., “…/30min”).
⦁ Display Settings
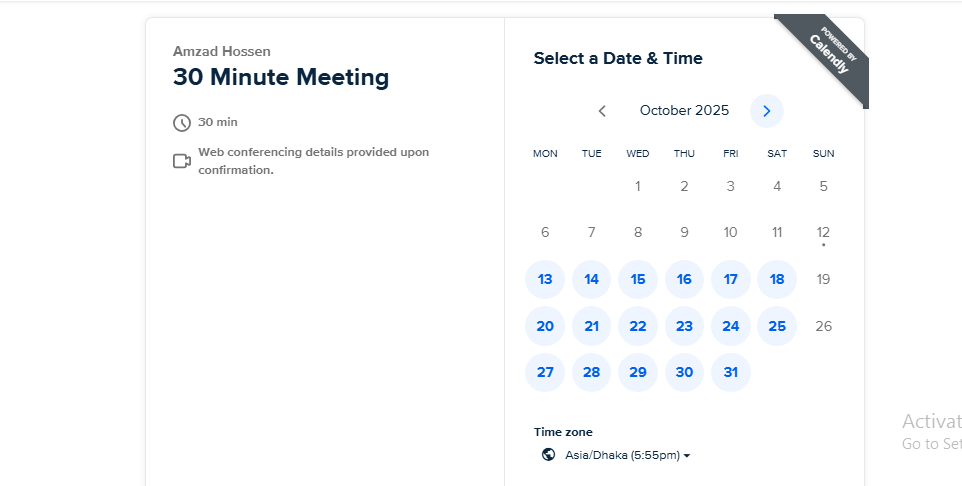
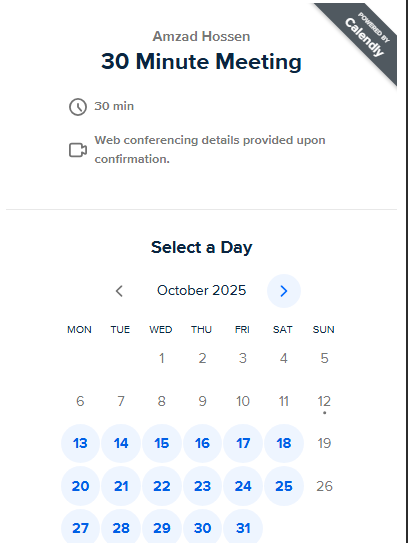
⦁ Inline (default): Shows the Calendly form directly on the page.
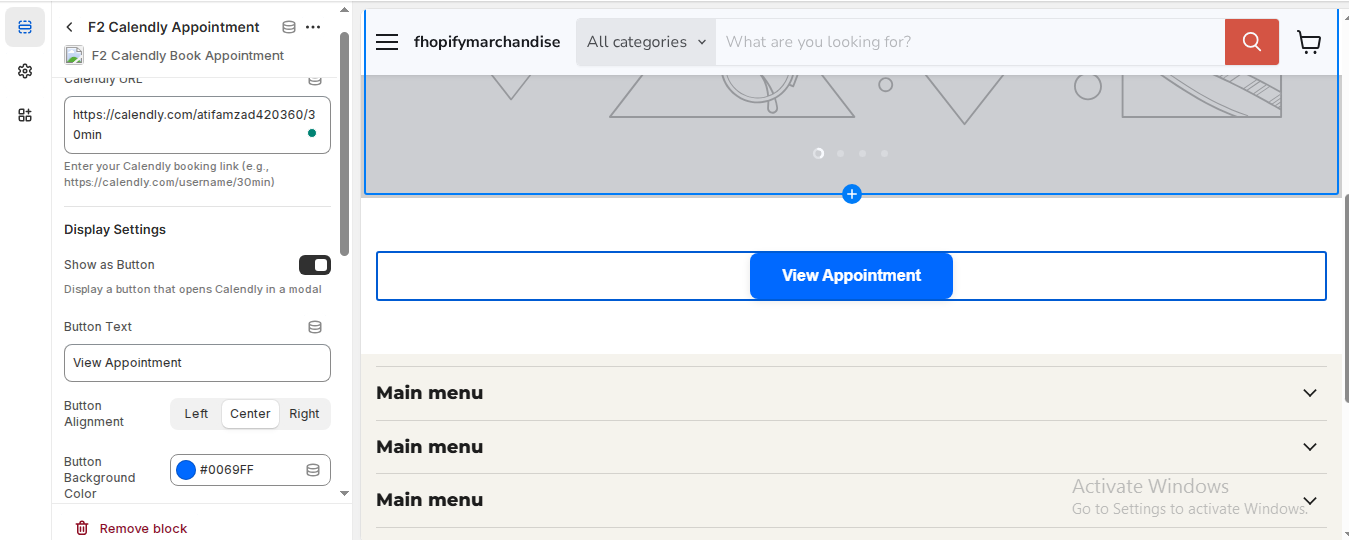
⦁ Show as Button: Toggle On to show a button that opens Calendly in a modal.
⦁ Button Options (if Button is On)
⦁ Button Text: e.g., “Book Appointment” / “View Appointment”.
⦁ Alignment: Left / Center / Right.
⦁ Background Color: Match your brand color.
⦁ iFrame Height Controls
⦁ Desktop Height: e.g., 1000–1200px for a 30‑min flow.
⦁ Mobile Height: e.g., 1200–1500px for scroll‑free fit.
⦁ Tip: Increase height until no internal scrollbar appears.
Add to Multiple Pages
Repeat Customize → Add block/section on any other page where you want the booking flow.
Test the Flow
1. Open the page on desktop & mobile.
2. If you see any inner scroll, raise the Mobile/Desktop height a bit.
3. In Button mode, click the button to verify the modal opens and loads the correct Calendly link.
If you need Support, please message us on WhatsApp. We will give you a response just in one minute. Or mail to us, Amzadhossen420360@gmail.com Or Contact Our Support Website : https://friends2a-technology.com/fhopify/contact-us/
F2 Calendly Book Appointment embeds your Calendly booking page directly in your Shopify store. Paste your Calendly URL to display the appointment form inline, or switch to a sleek button that opens the form in a modal. Control iFrame height separately for mobile and desktop—no scroll bars, always a perfect fit. Customize button text, alignment, and color. No code required; Online Store 2.0 block, fast and responsive. Use on any page so customers book without leaving your site.
Paste Calendly URL to embed booking form anywhere.
Inline view or modal button; toggle instantly.
Separate iframe height for mobile and desktop.
Scrollbar-free, responsive layout for clean UX.
Custom button text, alignment, and colors; no code.